Resources
The table tool
Last updated: November 2021
Contents
Getting started
Prefer to learn by watching? Need assistance? Familiarize yourself with how to use the Table Tool and learn the various ways to receive support.
Workflow
Get a feel for the Table Tool's workflow by seeing three tables being formatted in as many minutes. After watching the video below, you'll be all set on starting your table formatting journey.
 The Table
Tool - Workflow
The Table
Tool - Workflow
Support
If you require support, please don't hesitate to reach out to us through the form in the footer of the page or by tweeting us @cslegaltools. All of the videos on this page (and more!) are easily accessible on our YouTube channel at www.thetabletool.com.
Interface
Allows users to interact with the add-in. The Table Tool is organized in the two areas listed below.
Four formatting sections
Control area
Provides functionality for execution, bottom cell borders, navigation and notification.
Execute
Executes all checked options in the active section (i.e., Cleanup, Structure, Financial or Styles).
Clear
Clears all checked options in the active section (i.e., Cleanup, Structure, Financial or Styles).
Application
Performs operations on the current table (i.e., the table the cursor is currently located) or multiple tables (i.e., all of the tables currently selected).

In order to apply selections to multiple tables, the "Execute" button in the lower left of the utility must be used to commence execution. The green, triangular execution buttons in the application only format the table the cursor is currently in.
The Table
Tool - Multiple Tables
Table Navigation
Navigates to the previous and next tables, if any, in the document.
Notification area
Keeps users informed of (i) feature-related details and (ii) whether or not execution was successful.
Cleanup
The cleanup section assists users to either (a) create an entirely new table for formatting or (b) rectify unnecessary and problematic items in existing tables.
Conversion
Two conversion options are available to assist with converting tables into a new structure. A review for structural integrity should be performed after each conversion. Use the simplified method for tables that don't convert well with the default option.
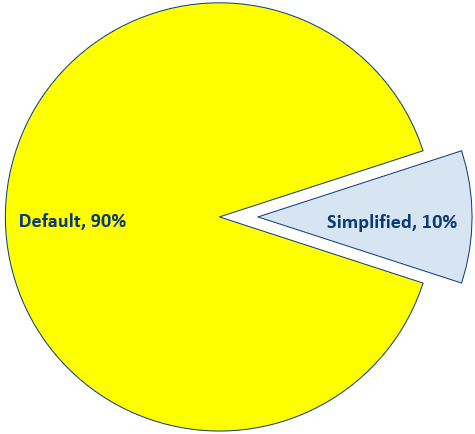
Typical use of the two options.
Default
Attempts to maintain the structure of the table during conversion.
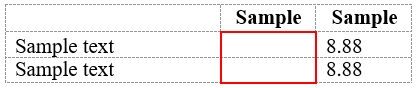
Blank cells in the second column, outlined in red, were maintained after conversion.
Simplified
Attempts to recreate the table without regard to the current structure.

Blank cells in the second column (see the original table from the default conversion option above) were not maintained after conversion and are now occupied with the content from the right.
Preserve line breaks
Maintains soft and hard returns during the conversion process. Available options include the first two (2) rows and the entire table.
The Table
Tool - Converting Tables
Miscellaneous options
Duplicate table
Copies the table. The new table appears under the original table separated by an empty paragraph. Content on the user's clipboard, if any, remains available to the user.
Uniformize cell margins
Disables the individual top, bottom, left and right cell margins in the Cell Options dialog box.
Please note, the Cell Options dialog box may appear during the execution of this procedure. Without changing any of the margins, check the "Same as the whole table" option shown below and press "OK" in order to proceed.
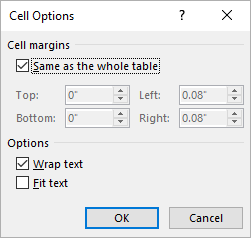
Microsoft Word Cell Options dialog box
(Table Layout ribbon > Properties > Cell > Options)
Clear formatting
Removes all of the character and paragraph formatting in the table.
Clear all tab stops
Removes the tabs stops in MS Word's Tabs dialog box. Actual tabs in the table will remain.
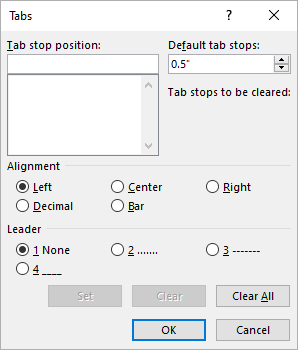
Microsoft Word Tabs dialog box
(Home ribbon >
Paragraph Settings > Tabs)
Join symbols (e.g., $, %, parentheses) with adjacent cell
If the symbols shown below are the only content in a cell, they will be moved in the direction indicated. The table structure is unaltered.
| Symbol | Direction moved |
|---|---|
| ( | Right |
| ) | Left |
| % | Left |
| Currencies* | Right |
Removal
Spacing before
Sets paragraph spacing before of all content in the table to "0 pt."
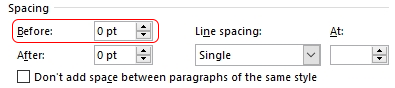
Microsoft Word Paragraph dialog box
(Home ribbon > Paragraph Settings)
Spacing after
Sets paragraph spacing after of all content in the table to "0 pt."
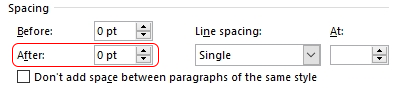
Microsoft Word Paragraph dialog box
(Home ribbon > Paragraph Settings)
Line spacing
Sets line spacing of all content in the table to "Single."
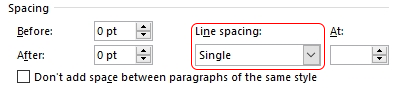
Microsoft Word Paragraph dialog box
(Home ribbon > Paragraph Settings)
Row height
Clears row height from all rows in the table.
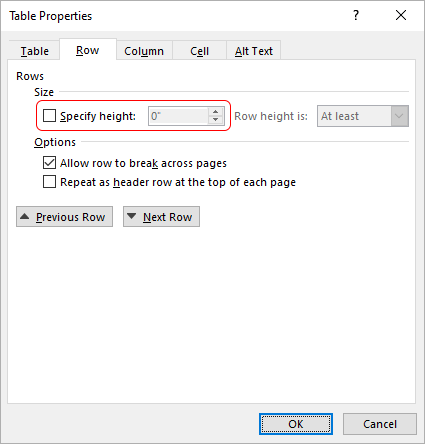
Microsoft Word Table Properties dialog box
(Table Layout ribbon > Properties > Row)
Table borders
Removes all cell borders from the table. Borders applied to paragraphs and text, if any, remain.
Table and cell shading
Removes all shading from the table.
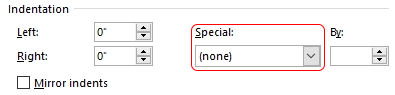
Clear indentation
Hanging
Removes hanging indentation from all of the content in a table. Left and right indentations applied to content, if any, remain.
Microsoft Word Paragraph dialog box
(Home ribbon > Paragraph Settings)
Left
Removes left indentation from all of the content in a table. Hanging and right indentations applied to content, if any, remain.

Microsoft Word Paragraph dialog box
(Home ribbon > Paragraph Settings)
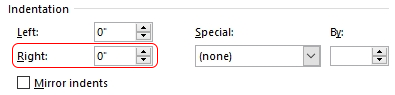
Right
Removes right indentation from all of the content in a table. Left and hanging indentations applied to content, if any, remain.
Microsoft Word Paragraph dialog box
(Home ribbon > Paragraph Settings)
Deletion
Empty rows
Deletes all empty rows in the table. This feature will not work in tables with vertically merged cells. As a workaround, split the table where the cells are vertically merged and run the procedure on the portion of the table without the vertically merged cells. Reconnect the table afterward.
Empty columns
Deletes all empty columns in the table. This feature will not work in tables with mixed cell widths or cells that have been merged across columns.
Spaces in empty cell
Deletes spaces in cells where they are the only content.
End of cell ¶ markers
Deletes trailing paragraph markers that are empty.
Beginning of cell ¶ markers
Deletes leading paragraph markers that are empty.
Trailing spaces
Deletes trailing spaces in cells.
Leading spaces
Deletes leading spaces in cells.
Structure
The structure section consists of the most used table properties in MS Word's Table Properties dialog box. Users can work efficiently by quickly accessing options without having the content of the document obstructed by a dialog box. Additional features in this section allow users to resize columns for financial tables and transpose columns and/or rows.
Microsoft Word Table Properties dialog box
(Table Layout ribbon > Properties)
The Table
Tool - Structure Section
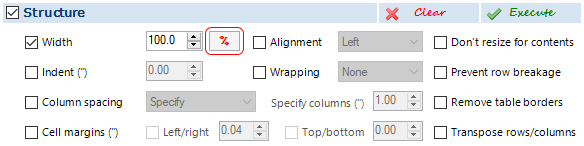
Preferred width
Changes the table width to the specified numerical value expressed as a percentage of the page (sans margins) or in inches. Press the button outlined in red below to toggle between the percentage and inch indicators.
The Table Tool Structure Section (ver. 1)
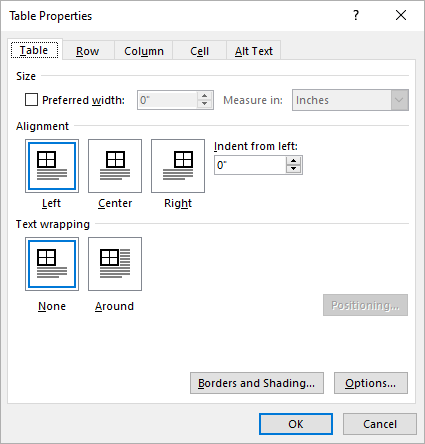
Indent from left (")
Indents the table to the specified numerical value.
Alignment
Aligns the table according to the option selected in the accompanying drop-down list. Available options are listed below. These options may not be readily apparent when the table has a width that's the equivalent of the page (sans margins).
Left
Aligns the table to the left of the page margin.
Center
Centers the table between the page margins.
Right
Aligns the table to the right of the page margin.
Text wrapping
Sets the text wrapping for the table according to the option selected in the accompanying drop-down list. Available options include "None" and "Around."
Column spacing
Formats the width of the table columns. Available options are listed below.
Even width
Distributes the width of all table columns evenly.
AutoFit to content
Resizes the table depending on whether cells contain content. The column widths are distributed evenly if the cells are empty. Otherwise, the column width is set so that information fits on a line (if possible). Tab stops, if any, are removed.
Ratio
Distributes the width of all table columns in a ratio where the first column is wider than the columns to the right. The ratio is applied to the remaining columns according to their current width (i.e., if the columns to the right are uneven in width, the ratio will be applied in the same uneven manner).
Specify
Distributes the width of the table columns to the right of the first column as indicated by the "Specify columns (")" field to the right. This numerical input is not visible when either of the previous column spacing options are selected. In instances when this option is unable to format the table (e.g., in tables with merged columns), the Table Tool will automatically default to the "Ratio" option above and inform you of the reason in the notification area.
The Table
Tool - Column Spacing
Cell margins
Changes the cell margins for the table.
Don't resize for contents
Deselects MS Word's option to automatically resize the table to fit its contents. This feature prevents the column width from changing automatically as content is typed.
Prevent row breakage
Prevents rows from breaking across pages (e.g., a two line cell will begin on the next page instead of breaking in the middle).
Transposition
Transposes rows and/or columns depending on the selection of the accompanying drop-down. Available options are listed below.
Columns and rows
Creates a new table where the row and column values of the original table become column and row values, respectively, in the new table.
This feature is limited to tables with 63 rows (which will become columns) since a newly created MS Word table cannot contain more columns.
Columns (reverse order)
Creates a new table where the order of the columns are reversed. Use the "Offset" drop-down to indicate the number of columns from the left that shouldn't be transposed.
Rows (reverse order)
Creates a new table where the order of the rows are reversed. Use the "Offset" drop-down to indicate the number of rows from the top of the table (e.g., header rows) that shouldn't be transposed.
The Table
Tool - Transposition
Financial
The financial section automates tedious tasks involved with formatting tables found in filings, financial statements, prospectuses, offering memorandums, etc.
Specify text column
The ability to indicate the text column in a table is a foundational piece of the equation for several features. Further explained in their respective sections, it provides users the flexibility to specify: (i) which cells are styled; (ii) which column tabs are placed into; (iii) the column that text indents are applied to; (iv) the cells affected by the data alignment feature; and (v) where cell bottom borders are placed.
Leaving the text column as "1" is sufficient for most tables. Users are able to change it by placing the cursor in a table and pressing the "Refresh text columns" button to update the drop-down list with the number of columns in the table.
 The Table
Tool - Text Column
The Table
Tool - Text Column
Header row(s)
Applies MS Word's heading row feature to the number of rows specified in the accompanying drop-down list. These header rows are repeated if the table spans more than one page. Formatting options applicable to header rows are listed below.
Bold
Manually applies bold to the content in the header row(s).
Keep with next
Utilizes MS Word's "Keep with next" option to ensure that the header rows won't become orphans if the table begins at the bottom of a page.
Font size
Sets the font size for content in the header row(s).
Underline
Applies underline to the cell content via the paragraph option in MS Word's Borders and Shading dialog box (i.e., the underline applied is not a character underline via MS Word's Font dialog box).
Omit underlining in the text column(s) and/or the last header row using the accompanying checkboxes.
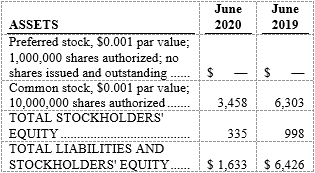
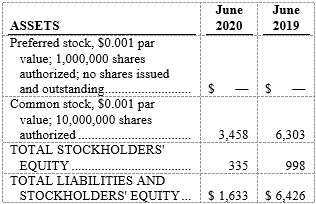
Alignment (new in ver. 2.1.0)
Aligns content of the header row cell(s) according to the column it's in.
The Table
Tool - Header Rows
Tabs & leaders
Inserts tabs in the specified text column. Tabs can be omitted in cells by checking any of the checkbox options listed below. This feature takes into account the column width when determining the tab stop position. Execute this feature again if the column width changes.
Header row(s)
Tabs are omitted in all rows designated as header rows either through the Table Tool or manually through MS Word's native feature.
Cells ending with colons
Tabs are omitted in cells with content that ends in a colon.
Blank cells
Tabs are omitted in cells without any content.
Cells with bold font formatting
Tabs are omitted in cells that are all bold.
Cells with capitalized letter(s)
Tabs are omitted in cells with the amount of consecutive capitalized letters selected in the accompanying drop-down list.
The Table
Tool - Tabs & Leaders
Text indents (")
Applies user-selected indents in the specified text column. Indents are applied beginning in the first cell after the last header row, if applicable.
Hanging
Hanging indents are mandatory.
Left
Check this option to apply a left indentation.
Right
Check this option to apply a right indentation.
As shown below, indents provide several aesthetic benefits for cells with content that spans more than one line.
Before indentations
After hanging and right indentations of 0.1"
Manual left indentation
Manually apply left indentation to the selected cells by pressing the "Manual left indentation" button.

The Table Tool Financial Section
The Table
Tool - Text Indents
Align data figures
Aligns content in data cells (i.e., cells that are neither included in the header row(s) nor the text column(s)) according to the accompanying drop-down list. Available alignment options are listed below. Check the accompanying "Accounting format" option to align currency symbols to the left of the cell for the "Decimal" and "Specify" options.*
Decimal
The Table Tool determines how the data figures should be aligned when this option is selected. This features takes into account the column width, characters after the decimal and font size. Execute this option again if any of these factors change. Vertical cell alignment is changed to bottom.
Specify
Provide a specific decimal tab stop position in the accompanying "Specify decimal tab (")" field to the right. The specify numerical input is not visible when any of the other data alignment options are selected. Vertical cell alignment is changed to bottom.
Left
Aligns content in data cells using the left paragraph alignment option. Tab stops in the data cells are deleted during this process. Vertical cell alignment is unchanged.
Center
Aligns content in data cells using the centered paragraph alignment option. Tab stops in the data cells are deleted during this process. Vertical cell alignment is unchanged.
Right
Aligns content in data cells using the right paragraph alignment option. Tab stops in the data cells are deleted during this process. Vertical cell alignment is unchanged.
Justify (new in ver. 2.1.0)
Aligns content in data cells using the justified paragraph alignment option. Tab stops in the data cells are deleted during this process. Vertical cell alignment is unchanged.
The Table
Tool - Aligning Data Cells
Bottom borders
Apply or remove bottom borders in the last four (4) rows of the table specified in the accompanying drop-down lists. Borders will be applied in cells to the right of the specified text column.
Last Row
Affects the last row of the table.
Penultimate
Affects the second to last row of the table.
Antepenultimate
Affects the third to last row of the table.
Preantepenultimate
Affects the fourth to last row of the table.
The Table
Tool - Bottom Borders
Row shading
Shade alternating or header rows by using the accompanying drop-down list and specifying RGB values. When applying shading to alternate rows, indicate where the shading should begin using the "Start" drop-down list.
Remove shading by selecting from one of the three options for removal (i.e., clear shading from (i) header, (ii) alternate or (iii) all table rows).
The Table
Tool - Row Shading
Styles
The styles section enables users to apply four (4) built-in or user-created styles for the header row(s), text column(s) and data cell(s). Click the "Refresh styles in drop-down lists" button to list styles that have been created after the utility was launched.
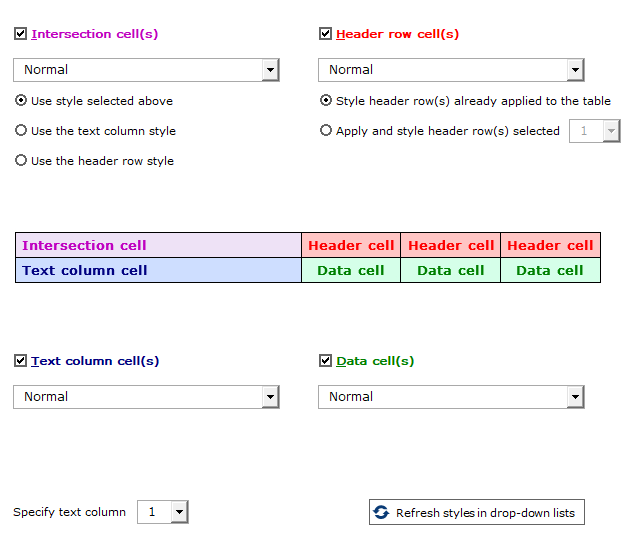
The Table Tool Styles Section
Header row(s)
Applies styles to the table row(s) formatted as headers.
Text column(s)
Applies styles to the table column(s) as specified in the drop-down list of the Table Tool's "Specify text column" feature. If the number in the drop-down list is greater than one, then the columns to the left of the text column will also be formatted.
Intersection cell(s)
Applies styles to the text column cell(s) that intersect with the header row(s).
Data cell(s)
Applies styles to the cell(s) that are neither included in the header row(s) nor the text column(s).
The Table
Tool - Styles
* Currencies supported are the: U.S. dollar ($), European Union euro (€), Japanese yen (¥) and United Kingdom pound sterling (£). Please contact us if you would like a currency to be added.